With digital music coming, the mp3 player has taken the high ground in digital music and video entertainment. So, what exactly are we talking about? MP3 is a term that relates to a standard of digital audio processing that allows digital audio files to be compressed in size and therefore made more portable. The mp3 player today however, is much more than simply a device that plays only mp3 standard audio files. It is now a universal term that includes players of all forms of portable audio formats and is used to identify a wide range of hardware from an equally wide range of player manufacturers, and a plethora of websites offering downloadable media. Clearly it is not so much whether you will listen to digital music and watch digital video, but the type of player that will best suit your purposes.
MP3 & Digital Media Players
What is your passion? How you want to consume your media?
There are a number of important issues to consider when choosing the type of player that will suit your requirements best. At the heart of this is the question of how you want to consume your music and video product. With the digital music revolution come three basic options. You can choose a player that has a hard disc for program storage, one that uses flash memory (memory sticks, flash cards and the like) or one that uses standard CD format with music stored in mp3 or other compressed formats. There is no one universal method that will suit everybody. Rather there are pros and cons for each, with different manufacturers offering different features, design, battery life, useability and prices.
The other really important development that may affect how you choose the right player is the fact that the online music and video programming is now widely available from all manner of sources, from artist direct through to iTunes. As the protection of artist's and producer's digital rights becomes more widespread, you can expect media players to be more able to share the different media formats and protection. reducing risk both for you and the artists involved.
The Hard-Drive Option
The crucial decision is how much memory. Hard-Drive players, such as Apple's iPod, are available with up to 100GB of storage (but this could change in any nano-second). While they are physically small, Hard-Drive players are not the lightest. But 60 GB allows about a thousand hours of mp3 music. At around 4 minutes per song, that's about 15,000 songs. If being able to store a lot of songs is important to you, then you should consider the Hard-Drive option. Of course video program is more memory consumptive, and if you need to store large video programs then a Hard-Drive option makes good sense. A Hard-Drive player has a small computer hard-drive installed inside, so it has moving parts and can be damaged by shock, severe magnetic fields and too much sun. Some can also be quite bulky which means that a hard-drive player may not ideally suit a jogger, but if you fly Sydney to London on a regular basis, then it could be the solution. Hard-Drive players also tend to have a shorter battery discharge life than flash memory devices.
The Flash Memory Option
Flash memory offers some outstanding benefits. At the time of writing, flash memory goes up to 4GB, which allows about one thousand mp3 songs. When you consider the average radio station's active play list is less than two hundred songs at any given time, and shrinking, a 1,000-song capacity is quite substantial. In current recording terms, that could be as many as 60 to 100 albums. Moreover, flash memory has no moving parts and so can withstand slightly rougher treatment. And players can be considerably smaller and therefore more portable. Additional benefits come in the form of small, yet quite powerful storage media and astounding battery life.
The CD Media Option
Following on from the Sony Walkman phenomenon, portable CD players have been around for some years. Now however, portable CD players can play mp3 and other compressed audio formats as well as standard CDs. Using this technology, you can download your music to your computer and burn it onto a CD in mp3 format, and play it in your portable player. You don't need to concern yourself with storage capacity. A single CD will hold 700 MB of music, or around 175 songs. These players are limited in their other functions, but are often cheap to buy. However because they use CD technology (and therefore have moving parts), they are susceptible to shock and it can be quite inconvenient to carry a whole bunch of CDs around if you need a large library of music on your jogging circuit.
Controlling what you hear
Okay, so we've sorted out how you want to consume your music and now you have some leaning as to which type of player is going to suit you based on its media system and storage capacity. But there is still more for you to consider. There are two aspects to being able to control your audio through your mp3 player. One is its connectivity. In the first instance, you need to be able to download the music you want to hear in the format that's going to suit your player, and vice versa. So first you need to make sure you choose a player that is compatible with the source. (Frankly, you can't go far wrong with iTunes and most players, but there are many other options, including Virgin, Napster, Sony, all of which offer different media options.) Second, you need to have a simple connection between the computer you download your program onto and your portable mp3 player. Most players these days use USB serial interfaces. But there are also fire wire and wireless options. You also may want to consider whether you want to receive FM radio on your mp3 player, and whether you want to use your mp3 player to record program (much like a cassette player). These features are available on some players, but not on all. Furthermore, the recording options may be limited. A player that can record only wave files will limit your recording capacity. (One minute of stereo wave file is about 10 megabytes, compare with one megabyte in mp3 format.) There has long been the promise of music kiosks where you can simply charge a flash memory stick with new songs. Perhaps we will see this in the coming year.
The second aspect to controlling what you hear is the audio environment itself. You connect your mp3 player to your physical self through earphones, or you can plug it into your computer, your hi-fi system, and even use a wireless connection in your car. Not surprisingly however, one of the weakest links in the personal portable mp3 player is the earphone set. Most players come with a set of earphones, usually in the 'bud' style. Not everyone is comfortable with this style of earphone, and you may want to consider the earphones you use. A good quality set of earphones, (such as Shure's E4c) will enhance your listening experience for a variety of reasons. For prolonged listening, earphones need to be comfortable, both in a physical sense and in an auditory sense. Poor quality earphones are often uncomfortable to wear and deliver poor quality sound that can cause ear fatigue and subsequent long-term damage. Cheap earphones are flimsily constructed and any strong tug on the cords will cause the signal cables to break down. You also need to check out what controls the player provides you over the sound quality, and how easily they are accessed and understood. At minimum, you need volume and possibly some tonal controls, as well as track management and good visible indicators of the status of your player.
Size does matter
The importance of weight, physical dimensions and battery life cannot be understated. Most manufacturers promote a battery life. But like mobile phones, the product usually does not prove the claim. Why is this? It often depends on how the battery life is measured. In a laboratory for example, the test may be carried out with minimal human interference. But on the jogging path, every time you touch a control, you are using some power from the battery, whether it's just to illuminate the screen, or make adjustments to the sound quality. Battery life can be compared between manufacturers to give you some idea of how different players compare, but don't rely on the manufacturer's claims to be accurate under the conditions you will be using your player. You may use your player for a few hours each day, and then recharge every night. In such a case, extremely long battery discharge life may not be too important. But if you are trekking across the Nullarbor Plain and won't see a power point for several days, battery life is going to be critical.
Weight is also another factor. Remember, devices with Hard-Drive storage weigh more and are bulkier than devices with flash memory. CD devices need to be at least as big as a CD, and many are not much bigger. Consider how you are going to wear the player on your person, and be sure it will be comfortable.
And there are accessories
There are a lot of technical things associated with audio devices. Unless you're an audiophile, you may have a limited interest in such things as the signal to noise ratio (the amount of noise that is generated outside of the signal by the players amplifiers). The fact is, most players on the market have acceptable sound fidelity and the biggest weakness can often be found in the headsets and loudspeaker systems that they are connected to. You may also want to consider the accessories that are available, either included with the purchase or available separately. This may include power adaptors, carrying cases, additional memory, car adaptors and other software options to give you access to a wider range of entertainment and information.
Tuesday, January 26, 2016
Anatomy of a Camcorder
Camcorders are ingenious tools that allow us to record images of the events that make up our lives or to get creative and produce unique and interesting films that previously only professional videographers could craft. For beginners, it is important to understand a little bit about the basic anatomy of a camcorder in order to be better equipped to make a selection when shopping.
Although every camcorder model is a bit different and may offer unique features there are basic components that are common to them all.
The Image Sensor:
A camcorder uses either a CCD, charge-coupled device, or CMOS, complimentary metal-oxide semiconductor, to convert light into electrical signals and record the resulting images. They basically perform the same function as film in a traditional camera or camcorder.
A CCD consumes much more power than a CMOS chip but tends to produce a higher quality image. Images produced via a camcorder with CMOS tend to have more "noise" due to lower resolution and less light sensitivity. As with most technologies however, CMOS as the newer development is gradually gaining ground. The primary advantage of CMOS at this time is it's affordability versus the more expensive CCD sensors.
The Lens:
The lens of a camcorder provides the opening for light to pass through onto the CCD/CMOS and focuses it so that the image is sharp. By adjusting the lens users can alter what items within a scene are in focus as well as how much light is entering to control the look and quality of the resulting images. Lens controllers are sometimes purchased to allow a user to adjust the lens from the handle of the tripod.
Add on lenses and filters can be used. For instance a telephoto lens allows subjects at a distance to be magnified, a wide angle lens broadens the horizontal field, and a fisheye lens allows for an extreme wide-angle view. Common filters include polarizing filters to reduce glare and UV filters to protect the lens from harmful rays.
An important feature with camcorder lenses is optical zoom which allows the lens to magnify images; a function that allows users to obtain better pictures of subjects at a distance. Optical image stabilizers help to detect and reduce unwanted movement of the camcorder to produce a smoother, more stable film. Digital versions of zoom and stabilization are available on camcorders but do tend to produce a somewhat lower quality image. Digital stabilization however is sometimes preferred by some consumers as camcorders with optical stabilization are often larger.
The Microphone:
The average camcorder has a built-in multi-directional microphone. These microphones tend to pick up audio from any direction; from behind, in front of, and at the sides of the camcorder. Thus many home movies end up difficult to hear due to undesired "background noise".
A camcorder also often has a microphone jack. If the camcorder has such a jack, purchasing an external microphone to attach to it can greatly improve the audio captured. External microphones can be moved closer to the sound source in some instances and in others they can focus on the sound that is desired versus any background noise. Wireless microphones and lapel microphones are useful when recording individual speakers. Shotgun microphones pick up sound from in front of the microphone at a distance while cardioid microphones pick up sound from in front which is nearby. Each option helps to reduce the intrusion of unwanted sound that distorts the audio desired.
The View Finder and LCD Panels:
The viewfinder on a camcorder allows users to see what they are filming. They can be black and white or color. Size varies as does resolution. Some users select a larger viewfinder with higher resolution to aid their visibility but others simply use the LCD screen for this purpose. LCD screen sizes vary as well, and are selected based on personal preference. Viewfinders can often provide greater visibility when filming in sunlight while use of an LCD screen that swivels allows greater visibility if filming overhead.
Inputs and Outputs:
A camcorder will have AV sockets and ports to allow connectivity to other devices such as a television or computer. These sockets allow film to be downloaded, played back, or copied. To allow the camcorder to hook up with a TV or other device it is important that the inputs and outputs coincide. These may be composite video or S-video for analog signals or DVI/HDMI for digital signals.
Most camcorders will hook up with a PC via a USB 2 or FireWire port which allows much faster transfer than a USB 1.1 port. Again, the camcorder must be compatible with the computer to allow hook up.
Although the construction of a camcorder can be much more complex and there is variability in features from device to device, if beginners understand these basic parts they will be well on their way to being able to make a knowledgeable selection when shopping
10 Tips For Using Adobe Photoshop
Like a brush is to a painter an essential skill in the field of graphic design is Photoshop. The software offers increased productivity as well as flexibility. The features include aspects like file browser, vanishing point tool, smart sharpen filter, noise reduction filter, smart objects, as well as camera workflow enhancements. Photoshop offers professional photo editing features, digital imaging, as well as non destructive editing.
There are so many hidden features and insights to software, that it is often impossible to know them all.
1. There is a hidden option using which you can simulate bold and italic formatting styles for fonts that do not have these options. Click the button on the type tool option to bring up the character palette. Then select text and click the arrow in the upper right hand corner of the palette menu where faux bold and italics are present. However you will not be able to warp type when formatting has been applied.
2. One can quickly flip through blend modes while trying out effects by using the keys "shift+ to change to next mode and shift- to go to the previous mode." When a painting tool is active this shortcut will change the blend mode of the painting tool. However, if anything is highlighted then the shortcut will not work. You will have press esc and then use the shortcut keys again.
3. The photomerge feature can be used to seamlessly combine multiple images to create a panorama. This feature can be accessed from the Automate menu. You can even refine the composition using tools like rotate, zoom, pan, and set vanishing point.
4. When re-sampling images one can use either Bicubic Smoother or Bicubic Sharper. You can use Bicubic smoother for up sampling and Bicubic sharper for down sampling. You can actually specify which interpolation method is to be used by going to general preferences and setting a default.
5. There are two features for printing. You can use contact sheet II or picture package. Use contact sheet when you want all images in the same size and you want to print the name below the image. Use printer package when you want different image sizes on the same page, or multiple copies of the same image, or a text overlay.
6. If you want to remove a glare on the eyeglasses of an image you should use a part of the lens that does not have a glare and use it to layer the lens with a glare. Use tools like rotate and skew and soft-tip eraser to soften the edges. Ensure the glare does not show through from below. Or, do some careful work using the clone tool.
7. The online services enable you to connect to online photo printing and sharing sites.
8. The Web Photo gallery can generate hyperlink pages that can be uploaded to a server.
9. The Picture Package option will help you prepare photos in layout with multiple size prints on one page.
10. You will never forget how you achieved a certain result because the History Log will detail every step taken by you as well as time-tracking, and a legal record. There are three choices wherein, you can create a sessions only record where, it will record only when Photoshop is opened or closed; or a concise record which will record each action including the text that appears in the history palette; or the complete editing history including the text that appears in the actions palette.
Adobe Photoshop is a dream tool for every designer and one can over time master every subtlety of the tool and crop, rotate, resize, create shapes, add layers, change text, and play with colors. It is a hands on software where the more you use it the more you will learn.
14 Great Tips for Better Holiday Photos
Do you want better holiday photos? Are your snaps a bit of a let down? Follow my 10 top tips to get photos that will live up to the memories. You'll be amazed how good they'll look and your friends and family will too.
1. To get clear photos avoid camera shake or moving the camera as you take the photo. Squeeze the shutter gently and steady yourself against solid objects.
2. Frame the shot carefully to get well framed photos and keep fingers and other items away from the lens. Obvious but true and yes I have done it.
3. Experiment with compositions. Use roads and paths as strong lead-in lines, use objects in the foreground to add interest and tilt the camera for added drama.
4. Look for details. Often close-up shots of local objects can say as much about a location as scenic panoramas.
5. Take photos in the early morning light or the hour before sunset, know as the 'Golden Hours', for dramatic lighting.
6. Get up early and capture your holiday destination with a different character, empty of tourists and peaceful.
7. Really fill the frame with your subject for extra impact. Get close and then closer still. Move around and take photos from different angles.
8. Ask permission first if you want to take photos of local characters to avoid causing offence on cultural, personal or religious grounds.
9. Take photos on bad weather days. Some great atmospheric shots can be achieved when the weather is bad especially with stormy seas.
10. Frame your subject through doorways or windows to create a frame within a frame. Street entrances or trees can also work.
11. Photograph the old next to the new, modern next to the traditional or poverty in the midst of riches. These statement making photos will really stand out.
12. Look for strong graphic images such as sunset silhouettes or combinations of colour and form.
13. The sky can often be as dramatic as the land. If it is include more sky or even just the sky.
14. If you're shooting digitally check your shots as you go to make sure you get the best ones.
My final words are experiment, get involved, have fun. Don't be too stiff, relax and get into it. With digital cameras you can take as many photos as you want and just keep the good ones.
Take Better Photographs
People think that with the arrival of the digital camera, it is easy to take good photographs.
What is easy, is for us to delete the bad ones. It is still tricky to take a good photograph.
The best thing you can do is relax and not be in too much of a hurry to take a photograph. Really take time to compose your shot and make sure everything looks right before you press that shutter. Even though it easy to just delete the picture with digital, it is good practice to slow down, otherwise you could end up with 50 quickly taken photos and not a decent shot among them.
There are many ways that even the average snapper, with a few pointers, can take photographs that will actually make them money.
If you are trying to sell your work to magazines or other publications, the following tips will help you with some of the techniques needed to take a photograph that will sell.
1) Always use a tripod or monopod when shooting in bad light or when usinga slow speed. If you haven't room for either, pack a small beanbag to steady the camera.
2) To avoid camera shake, hold the camera in a comfortable position before you take the shot, squeeze the shutter gently and tuck elbows into the body to avoid camera shake.
3) Try and fill the camera frame with your subject for greater impact (unless your photois for a magazine cover in which case you need to leave room at the top for the title).
4) Look ALL AROUND the viewfinder before you press the shutter to avoid any clutter spoiling the photo or any stray branches sticking out of a subjects head!
5) When photographing kids, try to shoot them when playing and having fun for more spontaneous pictures. Don't forget to get down to their level otherwise you will end up with shots of the top of their head.
6) When taking photographs, especially landscapes, always turn around and look BEHIND you.There has been many an instance of the best photo of a shoot lurking there.
I hope these points will help you take better photos. Have fun with your camera.
Friday, January 22, 2016
Stress and Trading
I just came across a webinar delivered by a psychologist, Dr Andrew Menaker, for my friends at MarketDelta about 18 months ago.
This is probably one of the most interesting takes on trading psychology I've seen since Mark Douglas' work.
You can see it here.
If you know your enemy.....
This is probably one of the most interesting takes on trading psychology I've seen since Mark Douglas' work.
You can see it here.
If you know your enemy.....
Tuesday, January 19, 2016
Seeing Orderflow Change to Sell where I Expected It.
As I have said so many times - Context Rules. The pix below shows the bigger picture first: The market traded a swing down and then retraced - our typical pullback in the direction of the trend. While we used to just use the CCI to track this we can now use orderflow. The indicator is the Logik Volume Wand which creates the Volume Profile of the swing. There is also the VWAP there. The second pic is a close-up of where the trade triggers. As I said, there was a swing down and then a retracement. The retracement went to the POC of the swing and right below the VWAP - VWAP is the average value of the swing. The red arrow shows orderflow changing from buy to SELL and this is the trigger.
The context is very important as orderflow changes direction often and often without follow through. What is different here is that the context says that if the orderflow changes direction at the POC or VWAP then there is a good enough probability that there will be a big enough move in the direction of the change. The next piece is the trade management: stops and targets. This last piece of the trade is a very big part of being CP.


The context is very important as orderflow changes direction often and often without follow through. What is different here is that the context says that if the orderflow changes direction at the POC or VWAP then there is a good enough probability that there will be a big enough move in the direction of the change. The next piece is the trade management: stops and targets. This last piece of the trade is a very big part of being CP.


Monday, January 18, 2016
Play Audio Sound Using STM32
Bonjour, Aujourd'hui comme il est indiqu� au titre de cet article je vais essayer de produire une strophe musicale en utilisant la carte STM 32 F4 et un buzzer ou un speaker.

Commen�ons par d�finir le son :
Le son, c�est avant tout une vibration. Il faut que quelque chose bouge pour qu�un son soit produit. Par exemple, tu peux sonner une cloche, taper des mains ou pincer les cordes d�une guitare pour produire des vibrations qui vont g�n�rer des ondes sonores. Les vibrations voyagent d�un endroit � l�autre dans l�air sous forme d�ondes sonores.
Si les vibrations atteignent ton oreille, celle-ci va envoyer un signal � ton cerveau et tu vas entendre le son.

Mais si vous adore le physique vous pouvez lire ce que j'ai trouvez dans un article tr�s int�ressent sur le son au dessous sinon vous passer directement au test avec l'STM32
un son est une vibration de l'air. On peut en faire une repr�sentation graphique avec en abscisse le temps et en ordonn�e l'amplitude de la vibration : une onde plus grande aura un volume plus �lev�, une courbe "tass�e" en largeur repr�sente un son aigu. Car c'est la fr�quence de la vibration qui d�terminera la hauteur de la tonalit�. L'unit� de mesure des fr�quences est le hertz : 1 hertz correspond � une oscillation par seconde. Comme on le verra, nombre de param�tres concernant le son se mesurent en hertz, mais ne s'appliquent pas aux m�mes choses. Le la du diapason (ou de la tonalit� du t�l�phone) a une fr�quence de 440 Hz (la fr�quence des notes de musique suit une augmentation logarithmique, le doublement d'une fr�quence passe la note � l'octave sup�rieure). Bien que l'acuit� auditive varie d'une personne � l'autre, il est g�n�ralement admis que l'oreille humaine est capable de percevoir des fr�quences comprises entre 20 Hz et 20.000 Hz, avec une perte dans les aigus � mesure que l'on vieillit.
Une vid�o d'un haut parleur diffuse une fr�quence de 120 Hz dont les vibrations font danser ce liquide non-newtonien
Alors on peut conclure que le son en faite �lectroniquement est une combinaison entre un fr�quence et son delay d'ou on va se baser a cr�er notre programme suivant.


J'ai bas�e sur Mikro c for ARM comme toujours, pour le brochage y a rien de sp�cial vous pouvez m�me comprendre ce qu'il faut faire par les commentaires �quip�es sur le programme,
Alors si vous avez un buzeur ou un petit speaker apporter le et relier sa borne positive au PIN PE14 d'STM 32 et sa masse au masse d'STM32 et compiler ce programme au dessous et vous voyez la r�sultat.
Programme
// Let's Electronic by Aymen Lachkhem
// How to play Audio Sound with STM32 F4
//www.letselectronic.blogspot.com


void Tone1() {
  Sound_Play(659, 250);   // Frequency = 659Hz, duration = 250ms
}

void Tone2() {
  Sound_Play(698, 250);   // Frequency = 698Hz, duration = 250ms
}

void Tone3() {
  Sound_Play(784, 250);   // Frequency = 784Hz, duration = 250ms
}

void Melody() {           // Plays the melody from tones 1,2 and 3
  Tone1();
  Tone2();
  Tone3();
  Tone3();
  Tone1();
  Tone2();
  Tone3();
  Tone3();
  Tone1();
  Tone2();
  Tone3();
  Tone1();
  Tone2();
  Tone3();
  Tone3();
  Tone1();
  Tone2();
  Tone3();
  Tone3();
  Tone3();
  Tone2();
  Tone2();
  Tone1();
}

void main() {

  Sound_Init(&GPIOE_ODR, 14);         // the sound output  PE14
  Sound_Play(880, 1000);            // Play sound at 880Hz for 1 second

  Melody();                         //play the Melody that's we maked using Tones;

  while (1) { }    // Do Nothing

}
Voici une d�monstration vid�o de fonctionnement :
Have Fun :)
Sunday, January 17, 2016
Interfacing Servo-Motor With STM32
Interfacing Servo-Motor With STM32

Bonjour, Aujourd'hui on va discuter le fonctionnent du servo moteur en essayant de le contr�ler avec un STM32F4, contr�ler veut dire contr�ler quelle angle il la tourne vers. donc Commen�ons par une petite d�finition d'un servomoteur.
Un servomoteur est un syst�me motoris� capable d'atteindre des positions pr�d�termin�es, puis de les maintenir. La position est : dans le cas d�un moteur rotatif, une valeur d'angle et, dans le cas d�un moteur lin�aire une distance. On utilise des moteurs �lectriques (continu, asynchrone, brushless) aussi bien que des moteurs hydrauliques. Le d�marrage et la conservation de la position pr�d�termin�e sont command�s par un syst�me de r�glage.
Mais savez vous que la commande de servo-moteur est pas totalement comme le moteur dc genre on l'alimente alors il tourne ? savez vous que chaque servo-moteur a sa propre m�thode de commande et de fonctionnement ?
On peut tout �tre d'accord que chaque servo moteur il fonctionne avec un signal PWM pulse with modulation que j'ai d�j� d�finit sur cet article PWM. Mais il faut bien comprendre que chaque servo a sa propre fa�on de commande qu'on peut seulement la comprendre sur son fichier technique.


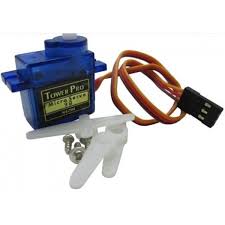

Alors pour comprendre le fonctionnement de chaque un, on qu'aller a sa fichier technique et lire exactement le pulse associer a chaque angle par rapport au p�riode cyclique qu'il a chaque un . citons cette exemple
les servomoteurs sont commander par les envoyer des pulsations. Ici le servo doit recevoir chaque 20 ms une pulsation ou le longueur de cette derni�re va indiquer a quelle angle exactement il doit tourner notre servomoteur.
Voila cette exemple:
- si a chaque 20 ms j'envoi une pulsation de longueur 1 ms le servo va tourner vers 0 degr�
- si a chaque 20 ms j'envoi une pulsation de 1.5 ms le servo va tourner pr�cis�ment vers 90 degr�
- ......
D'ici on peut conclure la m�thode de la quelle le servo on doit le commander avec notre microcontr�leur, une seule sortie num�rique est capable de le commander si je la met on niveau haut pendant la p�riode ou pulsation est active et je la met en niveau bas pendant le reste de la p�riode (20ms - pulsation).
Aujourd'hui je vais commander ce servomoteur via une carte STM32 F4
on se r�f�rant de sa fichier technique j'ai �cris le programme suivant:
//Let's electronic By Aymen Lachkhem
// Interfacing Servo-motor to STM32
// Letselectronic.blogspot.com
void servoRotate0() //0 Degree
{
  unsigned int i;
  for(i=0;i<50;i++)
  {
    gpiob_odr.f3 = 1;
    Delay_us(1000);
    gpiob_odr.f3 = 0;
    Delay_us(19000);
  }
}
     void servoRotate90() //90 Degree
{
  unsigned int i;
  for(i=0;i<50;i++)
  {
    gpiob_odr.f3 = 1;
    Delay_us(2500);
    gpiob_odr.f3 = 0;
    Delay_us(17500);
  }
}
     void servoRotate180() //180 Degree
{
  unsigned int i;
  for(i=0;i<50;i++)
  {
    gpiob_odr.f3 = 1;
    Delay_us(4400);
    gpiob_odr.f3 = 0;
    Delay_us(16000);
  }
}
void main(){


GPIO_Digital_Output(&GPIOB_ODR, _GPIO_PINMASK_3);     // configuration of pb3 as Digital Output
GPIO_Digital_Input (&GPIOA_BASE, _GPIO_PINMASK_3 | _GPIO_PINMASK_4 | _GPIO_PINMASK_5); // configure PORTA pins as speed control input
  while (1) {
     if (GPIOA_IDR.B3) {
    servoRotate0(); //0 Degree
    Delay_ms(2000);}
     if (GPIOA_IDR.B4) {
    servoRotate90(); //90 Degree
    Delay_ms(2000);}
     if (GPIOA_IDR.B5) {
    servoRotate180(); //180 Degree
    Delay_ms(2000);}
  }
}
Il est tout indiquer au commentaire de programme a propos la configuration, le principe est totalement simple ou j'aurai 3 entr�es num�riques que je vais utiliser comme des boutons poussoires qui vont forcer le servo moteur relier au sortie num�rique a tourn�e vers une angle bien pr�cise comme il est citer au vid�o au dessous
Une d�monstration vid�o qui r�sume tout le travail fait.
Subscribe to:
Posts (Atom)